Jam & Jerusalem

A New Way of Preserving

raspberry

For the past week I seem to have a new daily ritual. Picking soft fruit. Everyday there is another crop to pick. As we have not yet completed the fruit cage, it’s a race between me and the birds. 

A more predictable spring and summer with periods of sun and rain has been the perfect conditions for soft fruit this year. The raspberries and strawberries in particular. The strawberries have almost gone, but weather permitting the raspberry season should last until October.

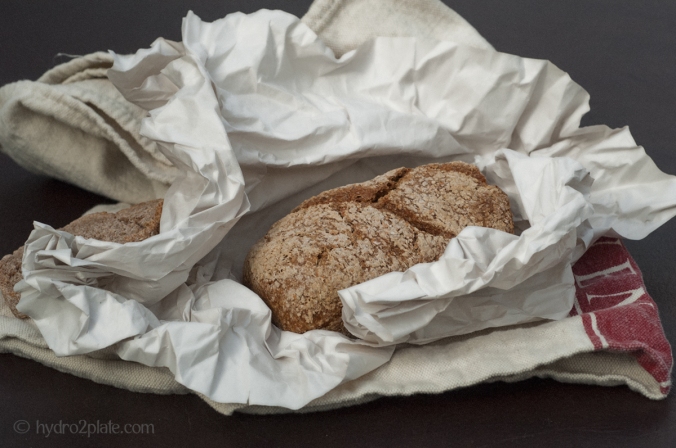
In the past I have made small batches of jams and preserves like my mum used to. Take some sterilised jam jars, fill with the cooked jam, cover the surface of the jam with a waxed paper disk and seal the jar with a clear plastic jam cover.  raspberry2This process is apparently called “Putting up”. A phrase I had not heard before this year. I believe it’s an American phrase from the 1800’s, correct me if I’m wrong, I’m curious to know more about its origins.

I’ve also tried using Kilner style jars with rubber seals and cooking the jars in water in the oven. Invariably a jar would always crack and I’d never know for sure if the seal was good. The pressure cooker method didn’t appeal to me either for the same reasons.

As I plan on preserving more this year, and concerned with the the safety of long term storage, we decided to invest in a Home Canning System from Germany. 

I wonder what the Women’s Institute (WI) would make of my jam recipes!

There’s no need to mess with a classic strawberry jam recipe so I kept that one simple and then also made a raspberry and mint jam.

Classic Strawberry

453g Strawberries washed, hulled, roughly chopped. Small fruit can be left whole
453g Granulated Sugar
3 Tbsp Organic Sicilian Lemon Juice (or Juice of 1 Lemon)
Place all ingredients into a large pan and bring to a rapid boil for about 10 mins.
Use the plate test * to determine when the jam is set.
Remove from heat
Fill sterilised jars and follow your Home Canner’s instructions for preserving jam

Raspberry & Mint Jam

453g Raspberries
3/4 Cup Mint Leaves
2 1/4 Cup Sugar
3 Tbsp Organic Sicilian Lemon Juice ( or Juice of 1 Lemon)
Infuse the sugar overnight with the mint leaves
Follow the same steps as for the Strawberry Jam.

* Plate Test – to determine the setting point for the jam. Place a teaspoon of the jam mixture on a chilled plate. If when cooled the jam wrinkles when pushed with your finger, the jam has reached its setting point.


A Quintessential British Summer

Tennis, Strawberries & Cream and Lemon Barley Water

Wimbledon started this week. 

Founded in 1877 it is the oldest tennis tournament around and inevitably some traditions have grown up around the event, such as the spectators eating British strawberries and cream. A perhaps lesser known one is that of lemon barley water.  After all ‘anything else just isn’t tennis’ *

Eric Smedley Hodgson apparently invented the drink in 1934 and it was served to the tennis players in the changing rooms to refresh them. This was the start of an 81 year old relationship between Robinson’s Barley Water and Wimbledon, and since 1935 bottles of the soft drink have been placed under the umpire’s chair.

Wimbledon reminds me of the warm, heady, pollen scented days of summer. It’s late afternoon.  Outside the stillness echoes the hush of the crowd on centre court, followed by the rich “thwak”of the opening serve.

Summer also means ice cream.

strawberry scoop

The strawberry patch was full of ripe fruit. The aromatic scent of Basil Genovese filled the hydro-tunnel and I had a bottle of organic Sicilian lemon juice in the fridge. So I made a batch of Strawberry & Basil Ice Cream. I first came across this recipe last year when I had a glut of basil leaves. The original recipe used ricotta cheese, but I couldn’t remember using that last time. I just wanted to keep it simple. So I searched for a few other recipes and merged a couple of them together. I also reduced the amount of sugar used by half.

Strawberry & Basil Ice Cream

455 grams Strawberries (washed and roughly cut up)
6 cups of Basil Leaves
1/2 cup Sugar
450ml Double Cream
250ml Gold Top Jersey Milk (full cream milk)
1/2 teaspoon Sicilian Lemon Juice.

Soak the cut strawberries in the sugar and lemon juice for about an hour
Blend the cream, milk, basil and strawberries together until mixed to your liking
Chill overnight
Churn the ingredients in an ice cream maker following the manufacturer’s instructions.straw_lemon

*Source 1988 Robinson’s Barley Water Advertising Campaign

A Break from Routine

The Royal Welsh & A Twist on a Salad Nicoise

The growing season is in full swing and there is always something to be done, but we managed a little R&R towards the end of May. We visited the Royal Welsh Spring Show in Builth Wells.

The Royal Welsh Agricultural Society’s main event is in July and attracts the proper farmers. The spring show is aimed at the smallholder. It’s the first time we’ve visited and it was fun, if a little wet on the first day, so we left early feeling wet and miserable.  However on Sunday, the weather improved and we explored the entire show.

People were exhibiting their livestock and there were many rosettes to be won. 

Traditional skills were on show, such as rope making, blacksmith and farrier skills.blacksmith

Many stalls were selling new equipment and small holder essentials and there were talks by experts on relevant smallholder topics, such as beekeeping and how to be self sufficient on one acre or less.

Most of the wet Saturday was spent walking round the food hall and sampling the local products on offer. From small independent producers of cheese, ice-cream, local honey to chilli relishes, homemade pies and cakes and the odd independent brewer producing Welsh pale ales. 

Arriving home at the end of a busy weekend it was time to throw something quick and tasty together. Something light, crisp and colourful to mark the true arrival of spring and incorporate  local or home grown ingredients.

The result was a variation on a Tuna Nicoise salad using Pembrokeshire potatoes, the first small eggs from the new chickens, oriental salad leaves and herbs from the hydro-tunnel.

tuna nicoise

Fragrant Tuna Nicoise
Grilled Tuna Steak
Hard Boiled Eggs

Sliced Cherry Tomatoes
Sauted Potato Cubes in Toasted Sesame Seeds
Endame
Sliced Welsh Onion (a type of salad / spring onion)
Served on a bed of Oriental Salad Leaves (a mix of Mizuna, Mibuna, Green Mustard Pizzo, Red Mustard, Pak choi Canton White, and Tatsoi).

For The Salad Dressingdressing
Chopped Chives, Cilantro, Garlic, Soy Sauce, Hemp Oil & Red Wine Vinegar.

Liver, Fava Beans, But No Chianti

Things Your Mother Would Make You Eat As A Child!

I remember disliking some foods so much as a child, that I would refuse to eat them, the humble broad bean (aka fava bean, faba bean, field bean, English bean to name just  a few of its aliases) was one of them.

They looked so green and tasty inside their fur lined pod when picked fresh. I didn’t like them because they were cooked the old fashioned way, popped un-peeled into a pan of salted boiling water, which meant they would end up pale and wrinkly.  The outer shell separating slightly from the bean inside. They always tasted dry and leathery. Sometimes the outer skin would fall off the bean completely and would stick to the roof of your mouth! Yuk!

Depending upon where you live in the world, broad / fava beans are either eaten whole or peeled. If picked young enough, they do not need to be peeled, as the tough skin has yet to form. 

If only my mother had peeled the beans or perhaps not let them grow too long on theparsley pod….

I now like broad beans. The first batch have been planted out into raised beds this week.. 

Here’s the  building blocks to a nice fresh broad / fava bean recipe, that you can enjoy with a ‘fine chianti!’ 

I used frozen beans on this recipe and parsley from the hydro tunnel.

Broad Bean & Parsley Houmous with Crispy Pancetta

Peeled Broad Beans
Bunch of Parsley
1 Clove of Garlic
Lemon Juice
Salt & Pepper
Crispy Pancetta Strips
Hemp Oil / Olive Oil

Blanch fresh beans first to make the skins easy to remove.
Steam beans until tender
Blitz all the ingredients together, apart from the crispy pancetta.
Add oil until you reach your preferred consistency
Top with crispy pancetta and serve with wholemeal toast or grilled poultry.houmous & toast

California Dreamin’

Sourdough & Pickup Trucks

There are two things I miss from my time in California, old Chevy pickup trucks and sourdough bread. I can’t do much about the truck here in the UK, but I can the sourdough.

At Hydro2Plate it’s not only important to us that we grow as much of our food as possible, be it hydroponically or conventionally, but that we make all our food from scratch

The humble loaf of bread is no exception.wholemeal SD

It’s relatively simple to start your own sourdough starter with some flour, yeast and water. That being said I was looking for something with a bit more heritage and authenticity. Everyone has probably heard of the original San Francisco Sourdough culture and I would have been happy with that, until I stumbled upon a place that specialised in all sorts of cultures. I was spoilt for choice.

In the end I chose the following, they are all slightly different and have their own unique personalities.

Yukon Culture – the story goes that this was passed down from a Yukon prospector.
Red Sea Culture  – from one of the oldest ethnic bakeries in Egypt on the shores of the Red Sea.
French Culture – from a small 150 year old bakery on the edge of Paris.
South African Culture – a culture strong enough to leaven wholewheat flour and has a good sour taste.wholemeal SD2

As wholemeal bread is healthier, I brought the South African culture to life first. Adapting a recipe from the Knead Bakery cookbook (a cafe/bakery located in Cape Town), I substituted the recipe’s ‘rustic poolish’ for my sourdough starter. The bread did rise, but not as much as I expected.
More practice is needed!

Slightly disheartened at my fist sourdough attempts I dug out my favourite french baguette recipe and using my steam oven for the first time, the bread came out quite well. 

baguette_wholemealSD

I can’t wait to bring another culture (or as they are affectionately known ‘my bugs’) to life as the sourdough adventure continues.

French Baguette Recipe
I use dried active yeast (readily available in UK supermarkets) instead of instant yeast for all my bread making. So the recipe has been adapted to work with dried active yeast.

Dried Yeast Prep
1 tsp white sugar
150ml warm water
1 tbs dried active yeast
Dissolve the sugar in the water. Whisk in the yeast and leave in a warm place for 10 – 15 minutes

Bread Ingredients Starter Dough
2 cups Canadian strong white bread Flour (112)
350ml warm water
Prepared yeast mix
Add yeast mix and water to the flour and stir wellbaguette
Cover and let rise for 3 hours.
If using an electric proofing box set temperature to 21 degrees centigrade

Bread Ingredients Step 2
2 cups Canadian strong white bread flour (112)
1 tsp salt
Mix the salt and flour together
Add the dry ingredients slowly to the starter dough and mix ingredients together on minimum to incorporate.
Once incorporated turn the mixer to 1 and mix until smooth and pliable
Rise for 1 hour and knock down.
Cut the dough into 3 and shape and let rise for another 20 minutes
Cook for 15 mins at 230 degrees centigrade.

Beetroot Bonanza

And other Winter Weeding Hidden Gems

It’s slightly melancholic putting a garden or polytunnel to bed for the winter and yet it’s strangely uplifting at the same time.

In the midst of all the nettles, weeds and radishes that had gone to seed there were a few hidden gems and some weird and wonderful things left behind to discover.

Despite the months of neglect I was able to harvest some final spoils of war.

There were a few tender baby Sutherland Kale leaves which I gently wilted to act as a bed for some sautéed scallops with a creamy gorgonzola and pancetta sauce.

Some weedy looking leeks, that I will use to make a Welsh Onion soup and a  then there was the bumper harvest of beetroot. bumper beets

My brother-in-law once told me that beetroot was notoriously hard to grow, so in the past I bought beetroot plants from the garden centre. Last year I grew them from seed for the first time. I did pick a variety that was supposedly “bolt hardy.” Bolting is where a plant has a tendency to go to seed prematurely, usually due to a sudden cold spell, and is not usable. I planted 2 crops this year and both did okay.

After pulling up the remaining plants, the larger beets were turned into beetroot mash served with sous vide lamb shanks with a beetroot sauce and served with fresh salad leaves harvested from the winter hydroponic garden. 

Beetroot Sauce

Saute chopped carrot, onion and celery.
Puree cooked beetroot in a jug blender with a little water
Add the cooking juices from the sous vide lamb shanks.
Thicken to desired consistency.
There’s no need to  strain the sauce at this point, unless you want a clear jus.

Handy Cooking Tip: Beetroots can be cooked relatively quickly in a microwave. 

The baby beets were left whole and pickled using my own pickling spice blend. I used a 500ml preserving jar and 155g of peeled baby beets. 

Beetroot Pickling Spice

1 tbs yellow mustard seedpickling spice
1 tbs whole black peppercorns
1 tsp mace blades crushed
2 tsp dried juniper berries
1 tsp black onion seed
1 tsp chili flakes.
Dry roast the spices. Don’t let the chilli flakes burn.
Add the roasted spices to 500ml of white wine vinegar & 80g of soft brown sugar and bring to a simmer.
Put the cooled cooked beetroots in a sterilised jar.
Pour over the hot spiced vinegar.
Add 1 tsp of course sea salt to the jar and seal.
These should be ready to eat in about 2 weeks.

One beautiful little thing I found nestling in the soil of my neglected polytunnel, protected from the incessant welsh rain were these delicate little tomatillo husks. 

Fifty Shades of Kodak Grey

In other words, It’s been raining… Raining…  and yes…  Raining!


kodak

I use these handy little test targets in the other job (TOJ) to assess colour reproduction. However the last few months I can safely say I could have used the Grey Scale target to determine, from the colour of the sky, how much rain we were going to have that day. The rain just has not stopped. Everything has turned to mud! 

With the ground waterlogged, there’s not been a chance to burn the weeds in the kitchen garden so that I could dig over and fertilise the patch ready for the next growing season. This may mean that the kitchen garden is not quite so productive this year and the more reason the hydroponic & other polytunnel need to be in full production.  

On a slightly drizzly evening, where the daytime sky had been maybe a 1 or 2 on the grey scale target we decided to introduce a little warmth and colour to brighten up an otherwise wet and dull few months.

We fired up the Pizza Oven.winefire

I have a favourite dough recipe that I got from the book American Pie by Peter Reinhart. I make a big batch at a time as it freezes well. I like the recipe  because even if you cook your pizza in a normal oven it makes a great base. 

I tend to omit or reduce the amount of salt and sugar used in recipes (just our preference), so for my pizza dough I changed the quantities used. I also adapted the recipe to work with dried active yeast (readily available in UK supermarkets), instead of instant yeast.

Neo – Neapolitan Pizza Dough

10 cups 00 flour
3 teaspoon salt
Yeast  *see below
4 tablespoons olive oil
500ml room temperature water

Dried Active Yeast Preparation

2/3rd tsp sugar
100ml water (taken from the 500ml)
2 tsp yeast
Dissolve the sugar in the water.
Mix in the yeast and leave in a warm place for 15 minutes.
This is now ready to use with the other ingredients.

Some of best garlic bread is the simplest to make when you’re using a wood fired oven.

Take a piece of pizza dough.
Roll it out.
Dot with garlic, butter (or olive oil) and maybe a sprinkling of parmesan and poppy seeds.

Today the sun shines and we had the first decent frost of the winter. It’s time to take stock, make a list of what needs to be done, as February is fast approaching and the first seeds will need to be put in the propagator. 

I have a few busy weeks ahead. Let’s hope the rain stays away.

Fried Green Tomatoes & Chutney

Stocking The Shelves for Winter

My mother’s pantry, was a narrow room with a sloping roof built under the stairs, just off the kitchen. The shelves on the lowest wall were reserved for the growing number of preserves she would make over the year. There would be all sorts of jams and jellies. Many flavours and colours. Strawberry Jam. Blackberry Jam. Quince Jam. Raspberry Jelly which was prepared just like jam but she’d strain the liquid through a jelly bag to make a crystal clear preserve. But there would be only one type of chutney on the shelf. Green Tomato Chutney. She made the same recipe year after year. I never did get a copy of it, but remember the main ingredients were unripe green tomatoes, apples, sultanas, vinegar and sugar. As for any herbs and spices – those remain a mystery.

With the end of season tomatoes just hanging on the vines, refusing to ripen, it was time to dig out the copper preserving pan and make my own green tomato chutney.

green tomato chutney

There are so many recipes out there, all with their own little variations. I wanted my chutney to be as typically Old English as possible. As chutney originated in India and was brought over and adapted by the Victorians as a way of preserving fruit and vegetables from the garden I wanted to use some traditional spices. As my mother’s chutney didn’t taste too spicy I used just Cyan and Turmeric.

The building blocks for a chutney recipe

2.5kg Green Tomatoes
500g White Onion
500g British Russet Apples
215g Sultanas
1 litre Distilled Malt Vinegar
475g Dark Muscavado Sugar
5g White Pepper
3g Cyan
3g Turmeric.
Once cooked don’t forget to let the chutney mature for about 3 months.

Next year I think I will experiment with a few more spices, perhaps some mustard seed, coriander, ginger and mace.

I saved a few green tomatoes to try something I’ve always wanted to taste…Fried Green Tomatoes –  a side dish from the Southern United States. Having never eaten them I had no idea how to make my own. I used a great recipe from the online magazine thekitchn.com

And the verdict? I love them! 

Hooked on the idea of using green tomatoes, other than as a substitute for tomatillos, I searched out other recipes and found Green Tomato Mayonnaise which made use of my hydroponically grown basil leaves.

Here are the links:

Fried Green Tomatoes:- http://www.thekitchn.com/recipe-recommendation-fried-gr-57523
Green Tomato Mayonnaise: – http://www.myrecipes.com/recipe/green-tomato-mayonnaise

Would love to know what you do with green tomatoes and looking forward to the long winter nights since we’ve left DST when I can sit back and think about my own recipes.

The Three Musketeers

Basque ChilLi, Tomato & Tomatillo  – Hydroponic Salsa Ingredients

Finally the Basque Chillis are turning red. I bought these seeds from http://www.realseeds.co.uk a family run company based here in Wales. What I like about this company is that they sell seeds for plants that you can save from one years harvest to plant the following year. Traditionally this used to be common practice by farmers and gardeners alike, but I think it is not so prevalent today. When the other job (TOJ) slows down a little I plan on starting to save my own seed. It’s something I feel quite strongly about with regards to ensuring my own food security.

One of the main reasons for the hydroponic polytunnel was to try and grow chillis. I’m growing 2 types,  a green Jalapeño, that’s not doing too well and the red Basque Chilli. The Basque Chilli is a fantastic heirloom chilli pepper from the South of France that does really well in the UK. They are a deep red chilli that will give you a warm glow!

Red Tomato & Tomatillo Salsa Recipe
Red Cherry Tomatoes *
Final Crop of Tomatillos *
Basque Chili *
Parsley *
Sweet Onion
Lime Juice
Spot of Sugar

* Ingredients were all grown in an unheated, natural daylight hydroponic polytunnel here in Wales. 

I made this to serve over a piece of poached sea bass, but any leftovers make a great bruschetta the next day.

A Bitter & Sweet Symphony in Orange

The Nagami Kumquat 

We don’t grow everything hydroponically. The small holding is a mixture of conventional soil based gardening and hydroponics. I don’t think it’s possible to grow everything hydroponically although I might be wrong. I still have a lot to learn. At the moment the main goal is to keep our hydroponic experiment as simple as possible.

As well as the kitchen garden, the hydroponic and the conventional polytunnel we have two greenhouses. One is dedicated to fruit growing. It’s currently home to a few dwarf trees – nectarine, apricot & cherry, and two grape vines whose root stock have been planted outside the greenhouse whilst the vine grows inside.

My pet project in this greenhouse is growing citrus trees. And it all started a few Christmases ago before we moved into our small holding.

Although I don’t have a very sweet tooth I do own one desert cookbook –  Ready for Desert (My Best Recipes) by David Lebovitz. That particular Christmas I was looking for something I could serve on Christmas Eve and I came across his Champagne Gelee with Kumquats, Grapefruits & Blood Oranges recipe. Convinced I had seen kumquats in one of my local supermarkets I was determined to make this desert. But could I find them? Not a chance. I ended up substituting mandarin orange segments instead. 

Moving to our small holding we made a list of criteria for deciding what to grow.
We like to eat it
It’s relatively expensive to buy
It’s difficult to buy

Hence the citrus tree project.

The Nagami kumquat is an unusual little citrus plant. It produces an abundance of small oval, orange fruits late in the season, that are eaten whole. The rind is sweet whilst the flesh bitter. A native to South Asia, the small evergreen bush needs hot marmalade_bamboo
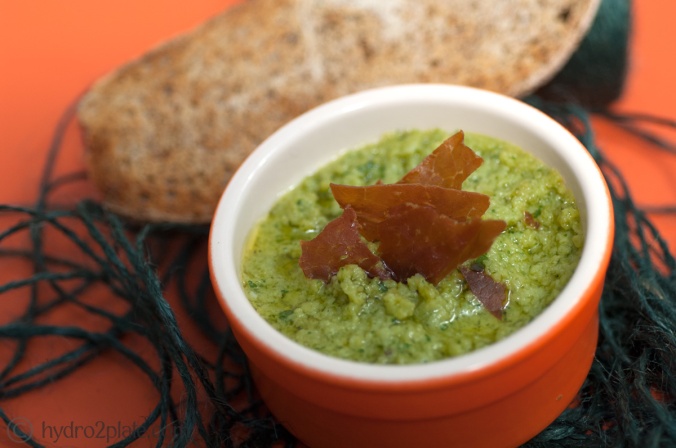
summers, but is hardy enough to withstand temperatures as low as -10 degree centigrade. Although the people I buy my citrus trees from recommend keeping the temperature no lower than 3 degrees.

With one of my bushes full of fruit, I searched online for ideas as to what to do with them and came across a kumquat marmalade recipe, by who other than David Lebovitz!

Here’s his recipe.
http://www.davidlebovitz.com/2014/02/kumquat-marmalade-recipe/